The cloud. All our data should be in it. It makes backup easy. It makes your life simpler as it’s one less thing to manage. But are you in control? It sometimes screws up. Who should you trust your data to? This is all Apple Music’s fault. It’s not really but it did get me thinking about how I manage my data especially as it only ever grows.
Data has been a problem for me for quite a while. I bought a Drobo back in 2009 which wasn’t one of my smarter buys. Proprietary drive format and also hit a nasty update bug upgrading from Leopard (I think) which meant the drive was toast until it was reformatted. Not what you want from a storage/backup device. Since then I’ve relied on internal iMac storage and a 3TB Firewire drive and shuffle data around other older drives. I looked at Thunderbolt but was never convinced about longevity of the format and the price was always way more than USB equivalents. Also my current Mac’s are USB2 only which make for slow access compared to Firewire and USB3…and I didn’t want to buy another Firewire drive as that technology is dying.
That left NAS and Cloud. I had a 2 bay drive a few years ago but was frustrated by fan noise and slow performance. It was also relatively expensive to setup a NAS solution. However when looking at Cloud options I have 2 main misgivings. Firstly is the lack of control of my data. Ultimately I’m in someone else’s hands when accessing my data. Secondly, it doesn’t always work. Also, Cloud has been trumped up as some miracle solution…it’s just off-prem storage and services. Although I do use quite a few Cloud services I can’t rely on them and they are used as fallbacks. I want my data local and I want to be in control of it with options to back up the data to the Cloud via a variety of services. So NAS it is.
The NAS would be primarily a home for my photo’s and video’s and also my movie and music collections as well as documents, software and other media. I also wanted the option of running a variety of software packages at various times of the day (mini server) and it would also be the home for my Mac backups.
Synology 415+
I looked at a variety of vendors but kept coming back to Synology mostly down to the large community, great software options and hardware which generally gets favourable reviews. After looking at a couple of options I settled on the Synology 415+. It has a couple of USB3 ports although the easily accessible port at the front of the NAS is USB2 only. It also has dual network ports and although theoretically you can bind them in practice it does’t yield much benefit. It’s also an Intel chipset which I was keen to get and has built in encryption so if I do encrypt some of my data it won’t kill the CPU.
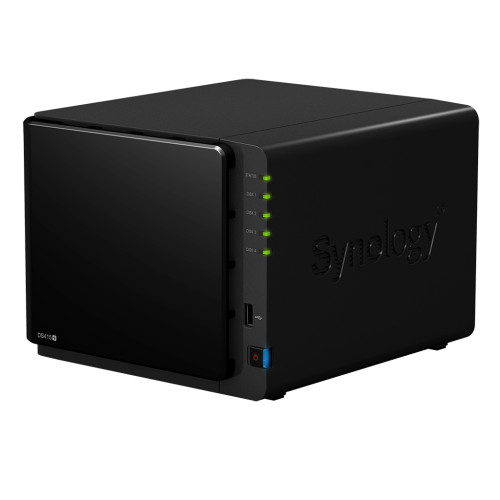
Next decision was how much storage to add. The 415+ is a 4 bay NAS and while I could have plumped for a couple of drives to get me going I wanted to get four in and give myself plenty of growth headroom. Drive prices have settled down again so I ended up going for 4 x 4TB Western Digital Red HDD’s. This would give me 16TB of storage which I would configure as Raid 5 so giving me around 12TB or so of usable disk while giving me the redundancy I was looking for – one drive could fail and I wouldn’t lose any data.
The 415+ is quite compact for a 4 bay NAS but this is down to the large external power brick that comes with it. Installation of the drives is very easy. Pop open the cover, lift a tab and slide out a drive mount. The 415+ doesn’t need screws for the drives, instead using plastic guides that click into place where the screws usually go. A nice touch is that the guides also have rubber grommets which should help to cut down on vibration. You then slide the drive mount back in. Do that another three times, plug in a network cable and power and you are good to go.
A couple of other hardware thoughts. Fan noise is always a bugbear for me but it’s not a big issue with the 415+. You know it’s on but it does a good job of keeping get drives and NAS cool without being overly distracting. The fans are also always running (at a slow speed) unless you switch of the NAS. It’s also all plastic although looks good with the logo’s either side doubling as air vents. It won’t win any design awards but it’s good enough.
Setup
When you first switch on you’ve a couple of options. You can install the Synology Assistant software on your Mac/PC or visit find.synology.com from your browser. This finds the NAS on your local network and starts the setup process. First steps are to create an admin account and download the latest version of DSM – Diskstation Manager. You then format and create a volume and are good to go. From out the box to disk available took less than 30 minutes.
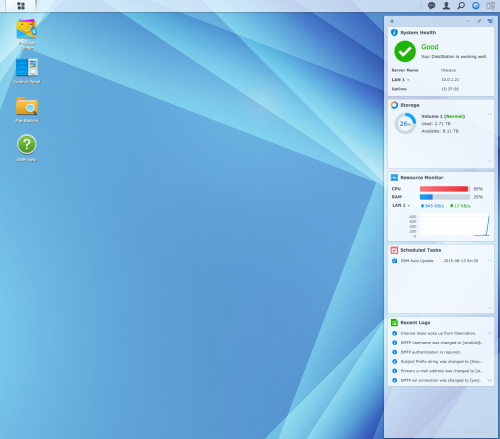
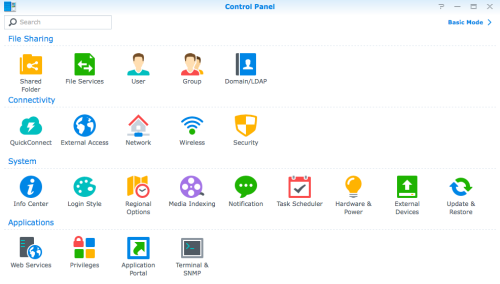
One of the advantages of Synology is DSM. It looks like an O/S when accessing from a browser and has a lot of capability out of the box. You can easily see status of your NAS, setup e-mail or text alerts for significant system events, create volumes, folders and shares and manage user access amongst many other features. Via DSM you can also install a number of Synology applications that have companion app’s for iOS and Android. There are obvious ones like Download Station to help manage downloads, Audio Station for music, Photo Station for images and Video Station for movies. Unexpected apps are Note Station – basically Evernote lite but you manage the data and Surveillance Station – hook in to a home alarm system and the NAS can manage
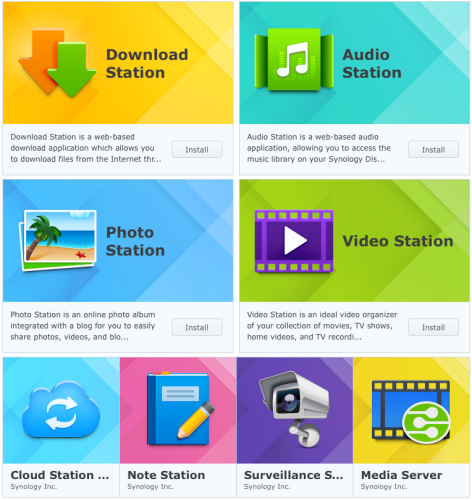
Some of the app’s are simple but a couple are really good including Photo Station and Video Station which is basically Plex Lite. While there is much to be gained from these app’s the real power comes via the third party app’s that Synology make available via DSM. There are some app’s for syncing to and from third party cloud providers and media options including iTunes and Plex. Depending on your needs and broadband connection you could self host WordPress, Git, Wiki and also e-mail via the supplied packages. There’s a lot that the NAS can do but be careful as the more you add, the more chance the NAS will be always on and you will start to use up resources as the 415+ only has 2GB of RAM.

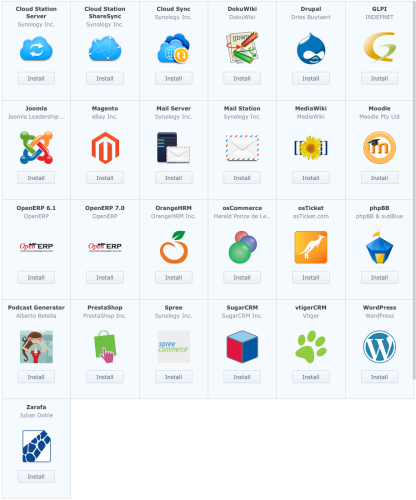
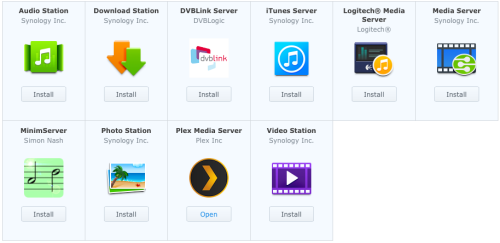
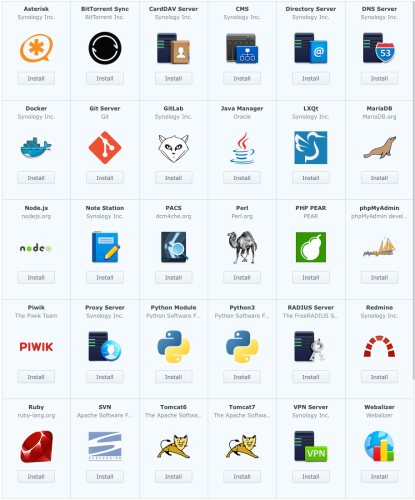
These are just the app’s supplied by default by Synology and not always the latest version, more on that later. However you can add in packages from third parties. One of the better resources is SynoCommunity which allows you to install Python and a variety of newsgroup and torrent managers amongst other things. You can add packages in manually or by adding new package sources. So for SynoCommunity login to your NAS and go to Main Menu, Package Centre, Settings and set “Trust Level” to “Synology Inc. and trusted publishers”. Then in the Package Sources tab, click Add, type “SynoCommunity” for the Name and “http://packages.synocommunity.com/” as Location and then press OK. Now when you visit Package Centre you will see a Community tab where you can browse and install packages from SynoCommunity. A comprehensive list of package sources can be found on the Synology Forums.
Before installing any packages I assigned an IP address to the NAS so I could guarantee it’s address going forward. There’s a variety of ways to assign an address either within the NAS itself or via a DHCP reservation within your router. I chose the later using the MAC address of the NAS to guarantee it always receives the same IP address.
Copying Data
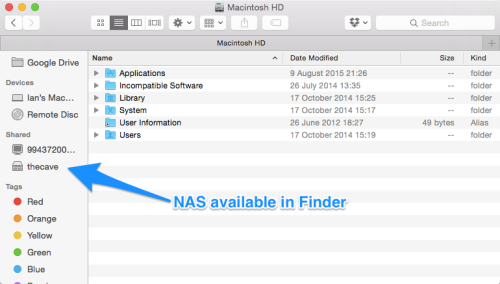
With the setup complete it was onto copying the data from the firewire drives and iMac to the NAS. I created a movies folder share on the NAS ensuring that guests do not have access and started off the copy. Accessing the NAS on the Mac is easy if you turn on “Enable Mac File Service” on the NAS. Once this is done it will appear under Shared. If not then in Finder click the Go menu and select Connect to Server.
It was early Saturday and I was out for the day but 8 hours later and it was still copying data. It was only 1.5TB so it shouldn’t have taken that long. Next was TV shows and again performance was awful. I messed around for an hour looking for reasons why the NAS was so slow but it turns out the issue was on the Mac side. I was using Path Finder on the Mac and copying to the NAS using Path Finder induced terrible performance. Swapped to Finder and it flew so it didn’t take too long to get the rest of the data onto the NAS.
Photo’s
I’ve moved my photo’s to the NAS but left the Lightroom library on the iMac. On launching Lightroom the library complains that the photo’s are missing but you just point to the folders (right click on folder and select “Find Missing Folder”) on the NAS and the library updates without issue. Lightroom handles a NAS well. If it’s off for whatever reason it doesn’t remove photo’s from the library, just states that the photo’s are offline.
I was a bit concerned that performance would be poor but it works really well. You can also move files/folders from within Lightroom itself which makes for a quicker workflow. In fact my future workflow will be to import and work on new photo’s on the iMac and when edits are complete then move to the NAS.
One thing I do have to sort is making better use of the various cloud photo options. Google Photo’s is very nice as is the new Photo’s service from Apple but I still pay for pro account at Flickr….and hardly put any photo’s or videos on it. This is something I need to sort over the coming months so I can have one place online that holds all my photo and video content.
Plex
I love Plex and it’s my main media manager allowing me to access films, tv and music anywhere. One of the main decisions when it came to the NAS was whether to buy one that would enable me to do 1080p transcoding which needs a meaty processor and a lot of RAM. I decided it wasn’t required as for mobile usage I very rarely access Plex from afar and locally my Plex clients can all now playback original content so no need for transcoding. I still had a niggle that the NAS would struggle though.
Although Plex is available via the package manager it’s best to install manually as Synology doesn’t do a good job in making the most up to date packages available. There’s an excellent support article from Plex that takes you through the installation steps but it’s really straightforward. Add Plex as a trusted publisher, download the Plex package and then install it on the NAS by doing a manual install. It takes a couple of minutes and before you know it you’ll have a Plex installation up and running.
Everything is configured via a web interface for Plex and the Synology package supports all the usual Plex options including Plex Pass. Once up and running you point Plex to your media libraries on the NAS and it indexes it adding posters, film info etc. For my modest library the indexing was pretty speedy and before long I had my Plex library up and running again but this time on the NAS.
Playback performance has been excellent which is a relief as it was my main concern. I rely on a wired network for playback on TV’s around the house as wireless just doesn’t cut it but I still had a niggle that the NAS wouldn’t be powerful enough but it is. Remote access to the library also works well. I can be anywhere in the world and access any media of my choosing. Plex makes this process really easy but I have found one issue – hibernation. With Plex running the NAS would fire up it’s disks every 20-30 mins, basically meaning it was always on. Without Plex it would sit in standby and fire up only when asked. Mmm.
I disabled most of the settings in Plex for auto updating metadata, library refreshes etc and this make zero difference. I then stumbled on a post on the Plex forums – Plex preventing hibernation once again. I enabled SSH, logged in to the NAS, found the offending file and dusted of the vi skills to comment out the offending line of code. Bingo. Plex now runs and is available from all clients at any time but the disks go into hibernation, only starting up when required. If I know I’m not using the NAS I’ll have it switched off but over weekends when I’m dipping in and out of data I want it to hibernate properly so I’m pleased to get to the bottom of that issue…and hopefully the Plex team will deliver a proper update sometime soon.
Music
I’m lost with this at the moment. I blamed Apple Music for the move to a NAS but it was just one of a variety of reasons. I’ve got a fairly large library of music and one thing I won’t be doing is deleting it from any computer and relying on a cloud version only. However both Apple and Google have copies of my music library so I can get to it from anywhere with ease….but I don’t trust the hosts. Apple Music has dabbled with my local library changing some album art, metadata and also mismatching titles. If this was cloud only I’d be frustrated. However this is with my local content – don’t fuck around with my content Apple!
So I will undoubtedly put all the music on the NAS but not sure if I will use the Synology iTunes server package, rely on Plex or look to something different. I’ve also got a fairly large collection of lossless that I don’t put to good use. Decisions decisions.
Backups
For backing up the Mac I’ve always relied on SuperDuper! rather than Time Machine and moving to a NAS does give me some options that I didn’t have before. SuperDuper! was used to create a bootable image, something you can’t do with a NAS. However following this guide I’ve got a regular backup to the NAS via SuperDuper! and it all happens automagically. I’ve accessed the image file created and all is well but I plan to keep my eye on it as it is a different method than I’m used to and I don’t want to trust it and find it has issues when I actually need it.
For backing up the NAS I’ll be looking at CrashPlan by using this user maintained CrashPlan package. The other area still to investigate is using the NAS as a Dropbox copy so I always have local access to that data rather than it being solely in the cloud.
Conclusion
I had no idea when I started this post that I’d end up rambling for so long. One thing is clear since I started this and also got the NAS – I’m really happy with the Synology 415+ and I’m probably using only 5% of what it can do but that 5% is working really well. Sleeping the NAS can be a pain though and the more I add to the NAS the more frustrating I can see this being.
I also feel in a much better place with my data in that the primary source is local to me, has redundancy built in and will soon be on various cloud services to reduce risk even further. It’s not the cheapest solution but I don’t want to lose my data and still don’t have enough trust in going cloud only. With that I’ll finish. Thanks for getting this far and I hope it was helpful!
